Flashing & Initial Setup Of Your DreamBox With Dreamup1 Before making any connections from your Pc to your Dreambox switch off both your Dreambox and PC.
2 Start universal DreamUp and make sure the Use Network option is unticked and select the com port your Null modem cable is attached to.

3 Now click connect, a status massage will be displayed saying the connections prepared now switch on the Dreambox.Do this by either switching back on the power at the plug socket or putting the power cord back into the power socket at the rear of your Dreambox.
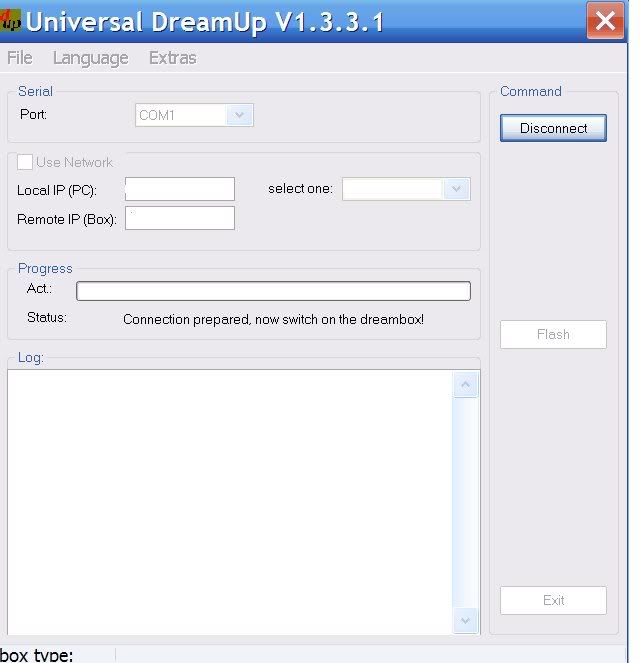
4 Now select Flash and point DreamUp to were you have your Dreambox Image and click open, the upload will now start. This will take around 12 minutes.
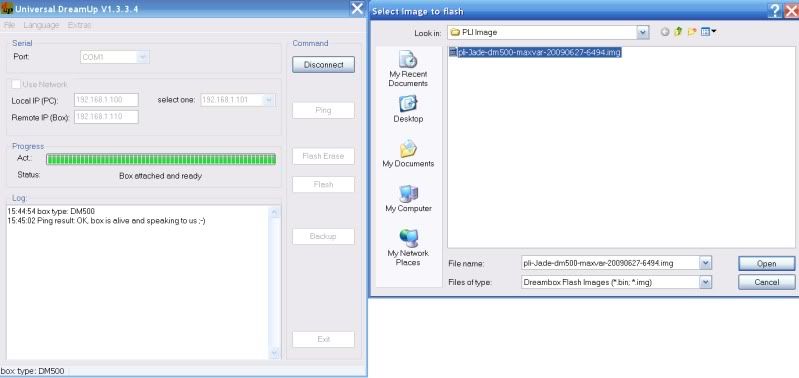
5 After the flash has completed click disconnect and power down then power up the box.
6 Time to get sat in front of the TV! As your box boots youââ¬â¢ll see the Boot Logo Screen come up maybe a couple of times.
7 At the Pal Screen Select Pal or the system your TV uses and then press the green button on your remote to save.
8 Select your language and press the OK button.
9 Select your time zone and press the green button to save.
10 Youââ¬â¢ll now see the Diseqc Setup menu and have 3 options to choose from
No Diseqc for a single LNB Setup.
Simple For a the setup of 2 Lnbââ¬â¢s
Complex for Diseqc 1.2 or Usuals/Goto X
11 If you want to use usuals keeps the goto x box ticked and enter your Longitude and latitude and press the green button to save.
12 Now select Auto Transponder Scan. This will scan all available transponders till a valid one is found. When found press green to scan. When the scan is complete press OK.At this point you can now scan another satellite with a press of the green button or red not to. Later on in this tutorial ill be explaining how to transfer channel setting so you donââ¬â¢t really need to.
13 Click exit and select a channel free to air to view.Now press the menu button-option5-reboot now, this will save your settings.
Thatââ¬â¢s the flash and initial setup complete.
Dreambox Image Install With FlashWizard Pro1. Extract Flashwizard Pro to a folder of your Choice.
2. Start Flashwizard with the FlashwizardPro.exe.
3. Click the configuration tab and select you language.

4. On the same page you'll need to fill in the Connection Parameters at the top of the page.
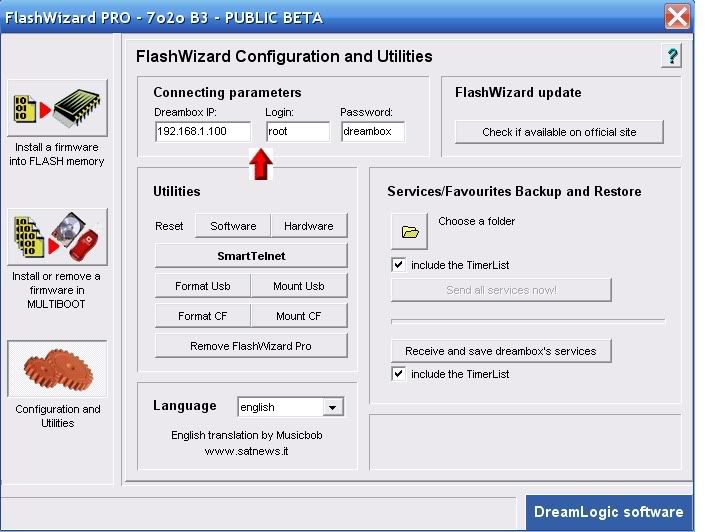
5. If you have not changed you password Login= root password = dreambox.
6. To obtain your dreambox IP do the following on your dreambox remote.
Menu-Setup-Expert Setup-Communication Setup.
You'll see your IP at the top of the page make a note of this and enter this IP into Flashwizard.
lso untick the DHCP box so your Dreambox IP will never change and remain static.
7. Now click the install a firmware tab top left.
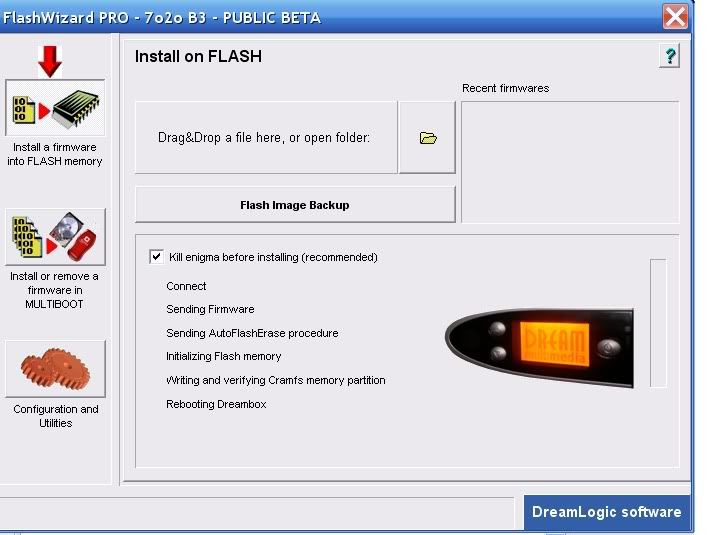
8. Now click on the yellow folder, this will open a browser window.
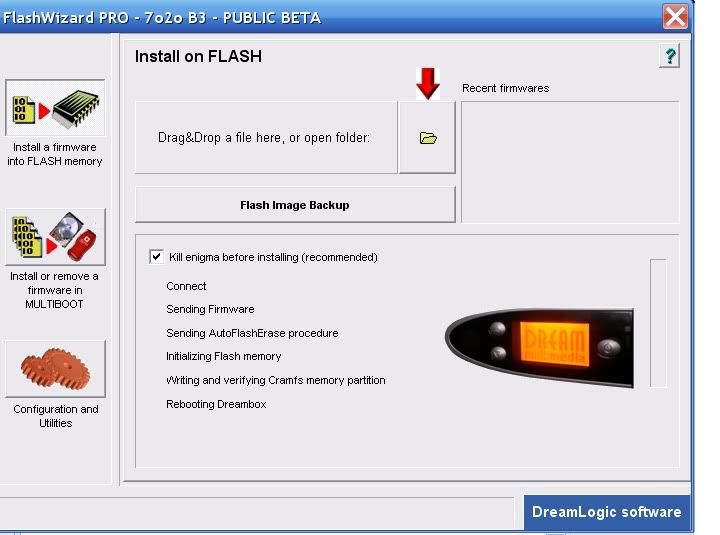
9. Now navigate to the Dreambox image you would like to install.

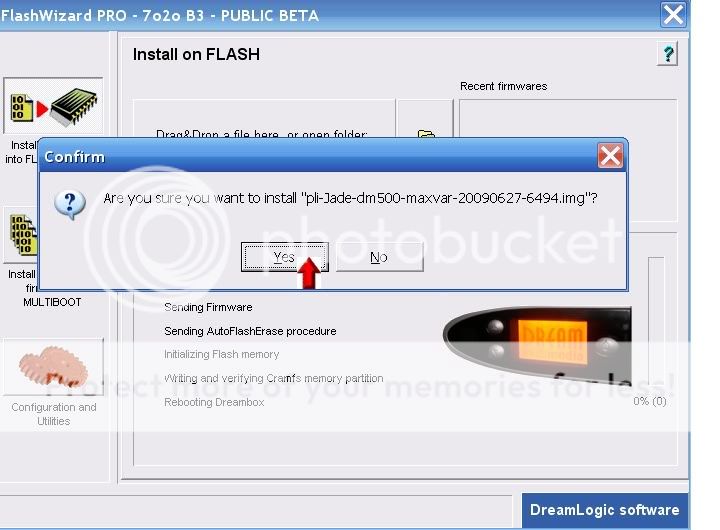
10. At the prompt select YES.
11. You'll now see the image been transfered.
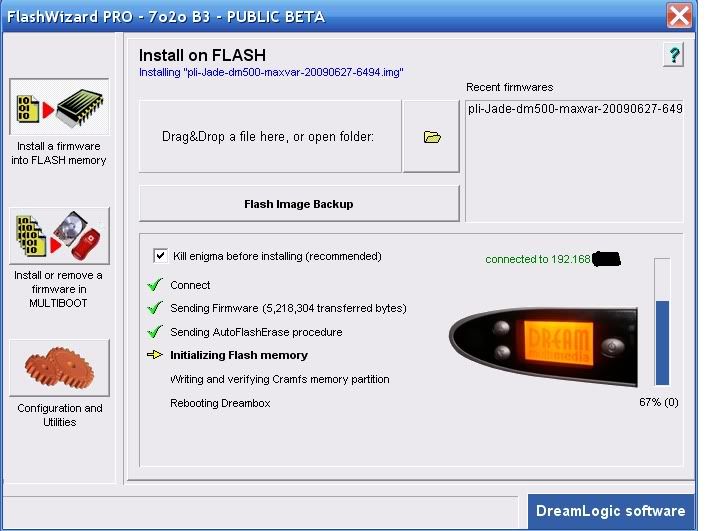
12. And then image transfer completed.

13. Exit Flashwizard and pull the power from you dreambox and wait for 30 seconds before reapplying power.
14. Time to get sat in front of the TV! As your box boots youâll see the Boot Logo Screen come up maybe a couple of times.
15. At the Pal Screen Select Pal or the system your TV uses and then press the green button on your remote to save.
16. Select your language and press the ok button.
17. Select your time zone and press the green button to save.
18. Youâll now see the Diseqc Setup menu and have 3 options to choose from
No Diseqc for a single LNB Setup.
Simple For a the setup of 2 Lnbâs
Complex for Diseqc 1.2 or Usuals/Goto X
19. If you want to use usuals keeps the goto x box ticked and enter your Longitude and latitude and press the green button to save.
20. Now select Auto Transponder Scan. This will scan all available transponders till a valid one is found. When found press green to scan. When the scan is complete press ok.At this point you can now scan another satellite with a press of the green button or red not to. Later on in this tutorial ill be explaining how to transfer channel setting so you donât really need to.
21. Click exit and select a channel free to air to view.Now press the menu button-option5-reboot now, this will save your settings.
Thatâs the flash and initial setup complete.
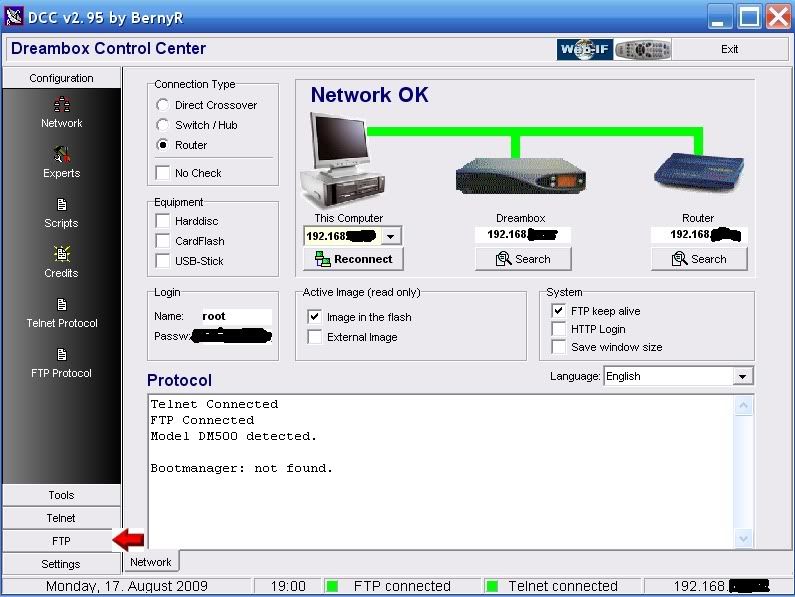
Dreambox Control Center Setup (DCC)
Dreambox Control Center Setup (DCC)1. Unrar DCC to a folder and start the program with the DCC.exe
2. First thing to do is select your Language.and enter your Dreambox password.
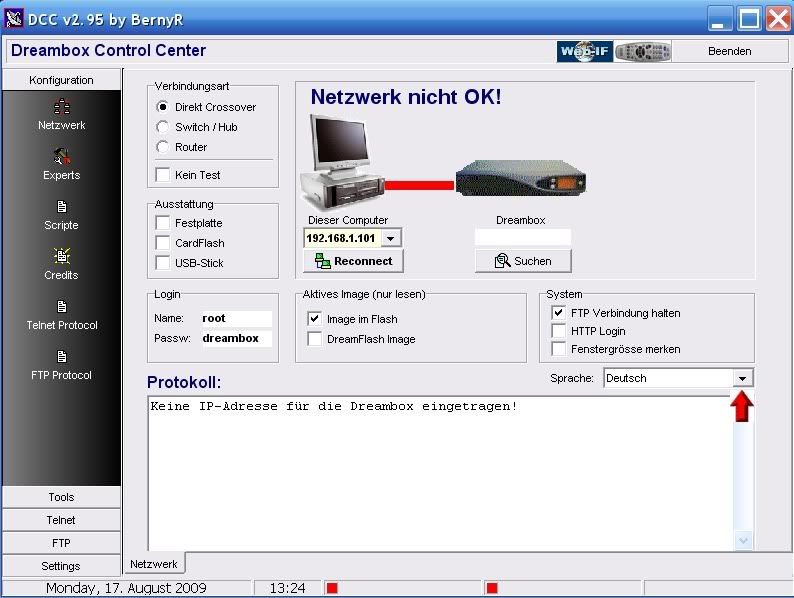
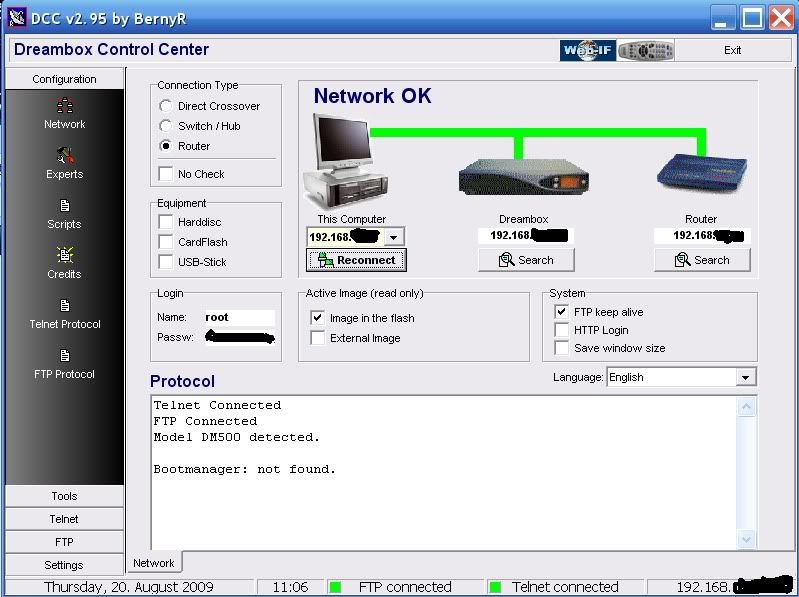
3. Now we need to select your Network configuration, most of you will have a router so this need to be selected.
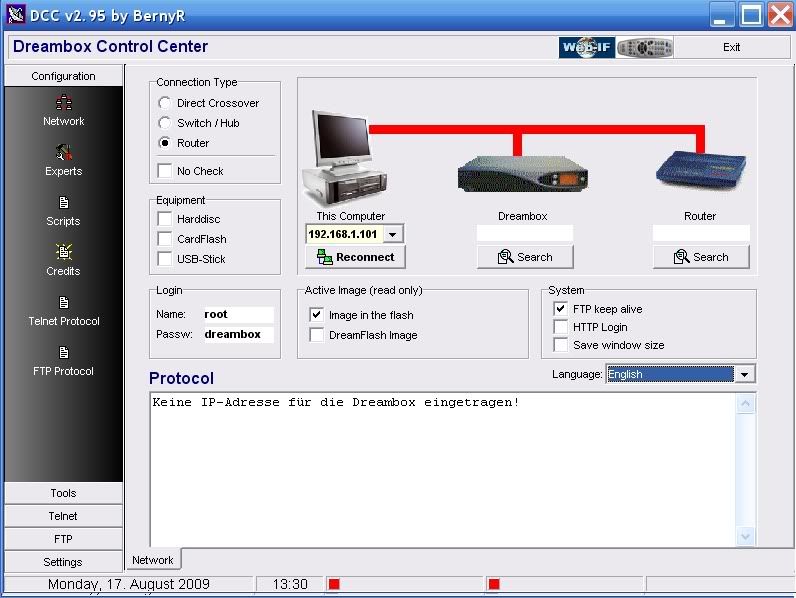
4. At this point if you know your Dreambox and Router IP's enter them manually if not press the search button below the router and then the search button on the popup.
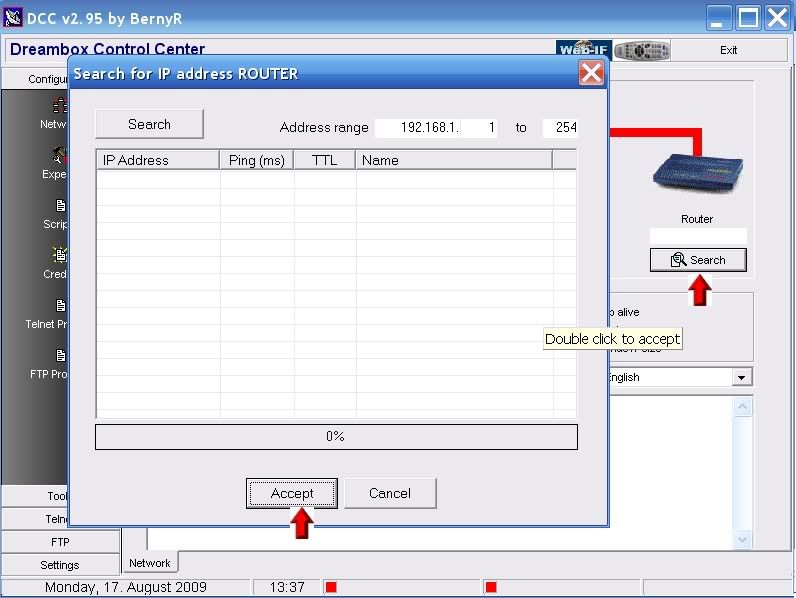
5. When DCC has finished searching your router will normally be the lowest ip in a range so highlight it and press accept.
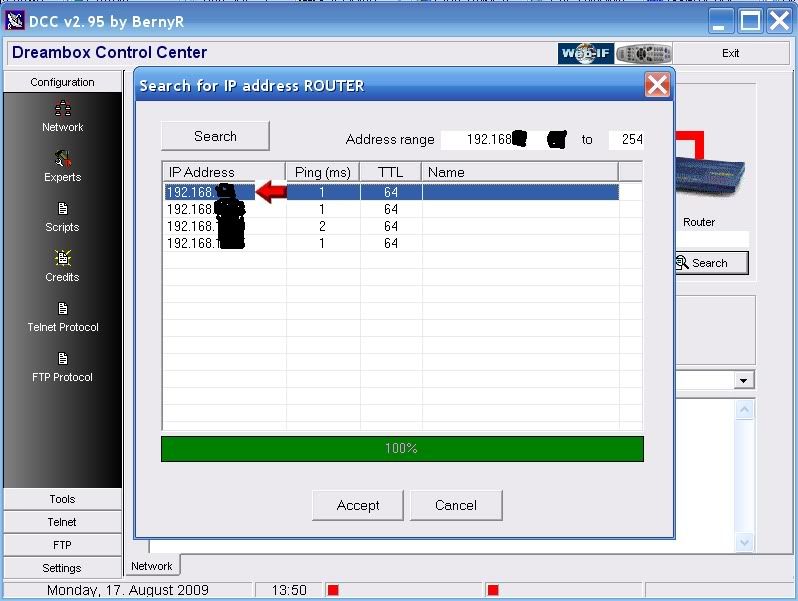
6. You can now repeat this to find the Dreambox IP or use the following method.
Menu-Setup-Expert Setup-Communication Setup.
You'll see your IP at the top of the page make a note of this and enter this IP in DCC under the Dreambox ICON.
Also untick the DHCP box so your Dreambox IP will never change and remain static.
7. After you have inserted the IP's click the reconnect button under the PC icon. If you have done this correctly all lines to the router and dreambox should now be green.
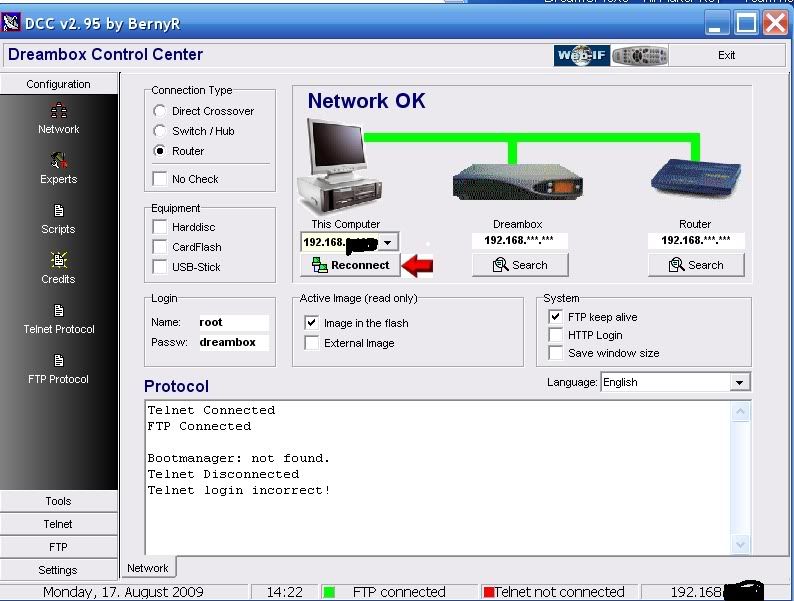
DCC is now configured.
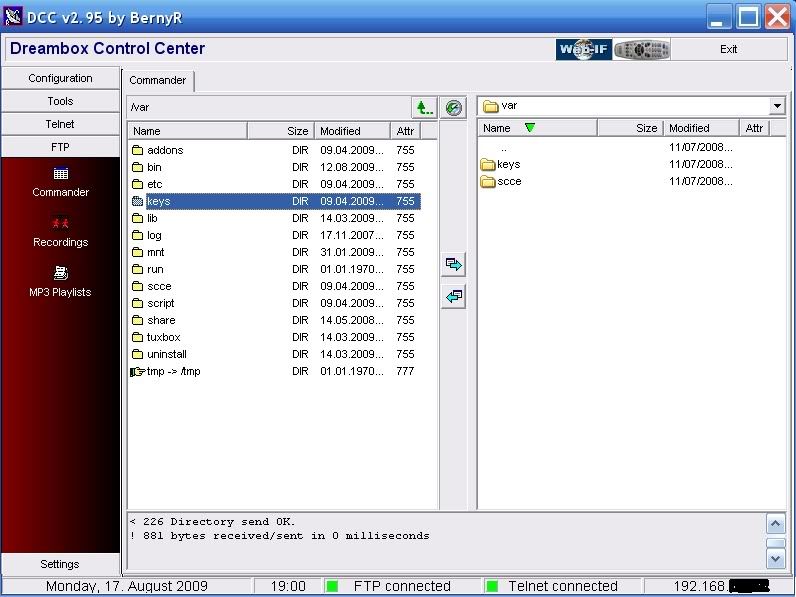
Manually Transfer Keys To Your Dreambox
Manually Transfer Keys To Your Dreambox1. Extract the keys of your choices to a folder
2. Start DCC295 and click on the FTP tab.


4. In the right hand window off DCC navigate to where you extracted your Dreambox keys go in one level so you can see the keys and scce folders and in the left hand window navigate to var/keys.
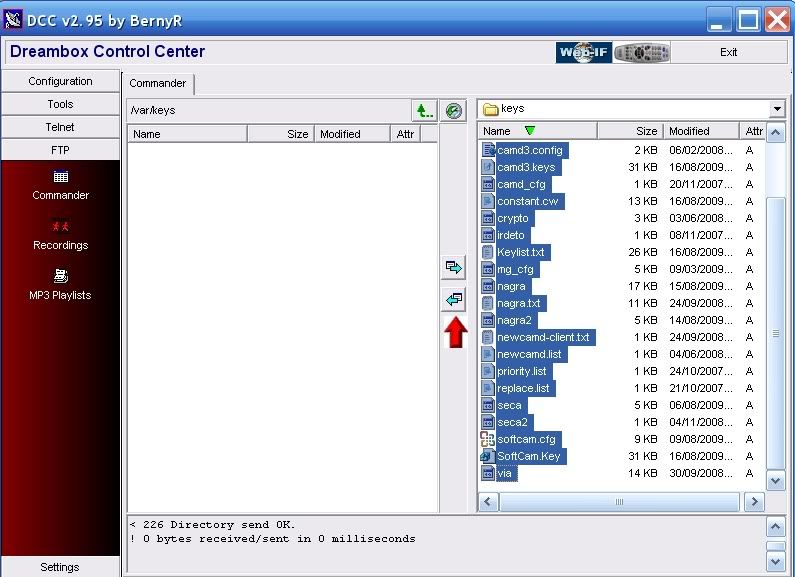
5. In the right hand window enter the keys folder and select them all. Now press the Transfer arrow to transfer the files over to var/keys in the right hand window.
6. Now go up a level in both window so you have var/scce in the left hand window and enter the scce folder in the right hand window. Now press the Transfer arrow to transfer the files over to var/scce in the right hand window.
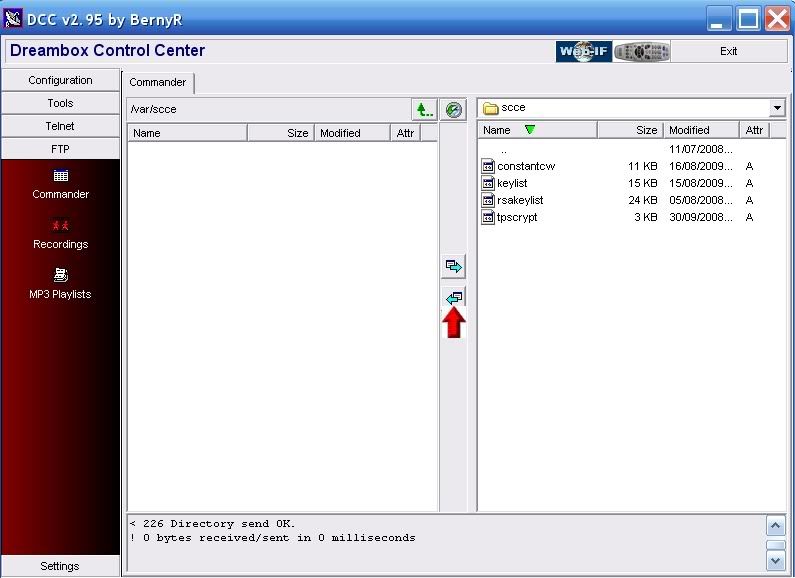
7. Now reboot your Dreambox Menu-shutdown-reboot now.
Job done
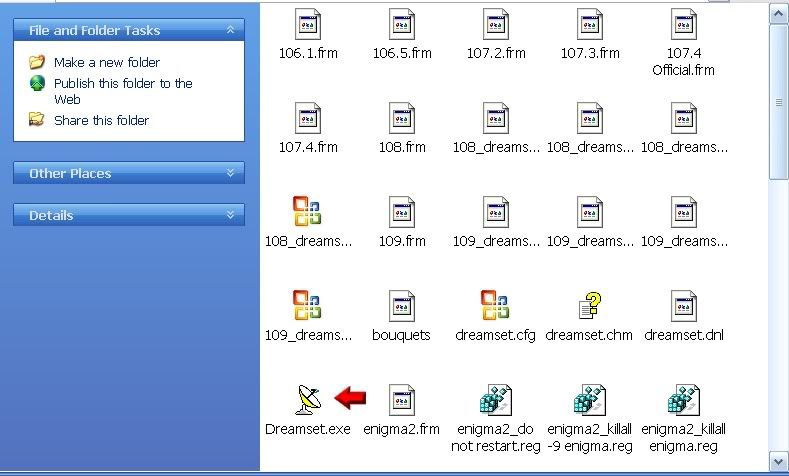
Transfer A Channel List To Your DreamBox With Dreamset1. Unrar Dreamset and place all the files into a folder.
2. Start the program with the little dish icon.
Click setup.
3. Click the setup Tab at the top and fill in your IP and passwords.
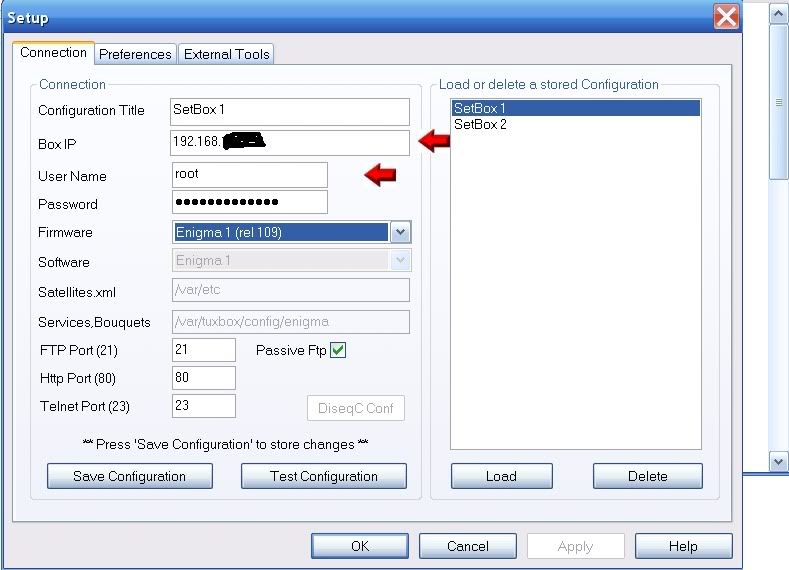
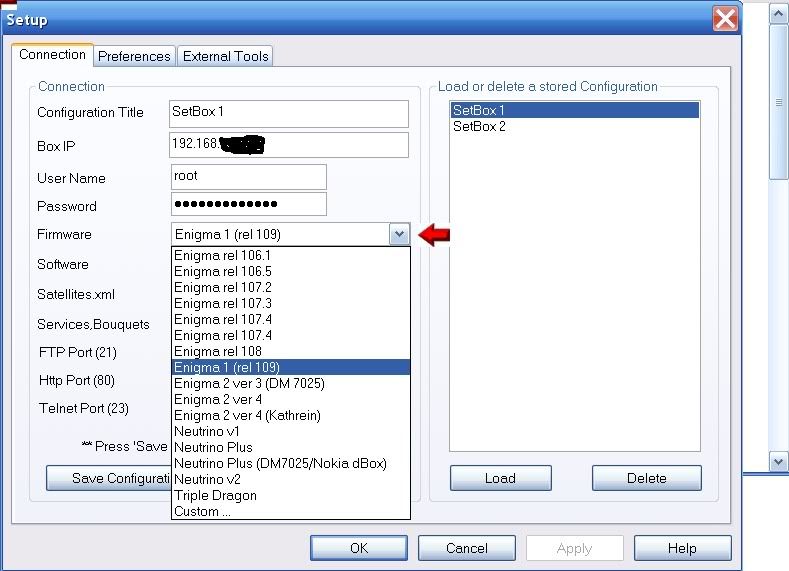
4. On the Firmware Tab for Enigma1 (500-7020) select Enigma 1 (rel109) for Enigma 2 (DM7025) and (800-800) use Enigma 2 version 3 or 4. Ensure passive FTP is ticked.
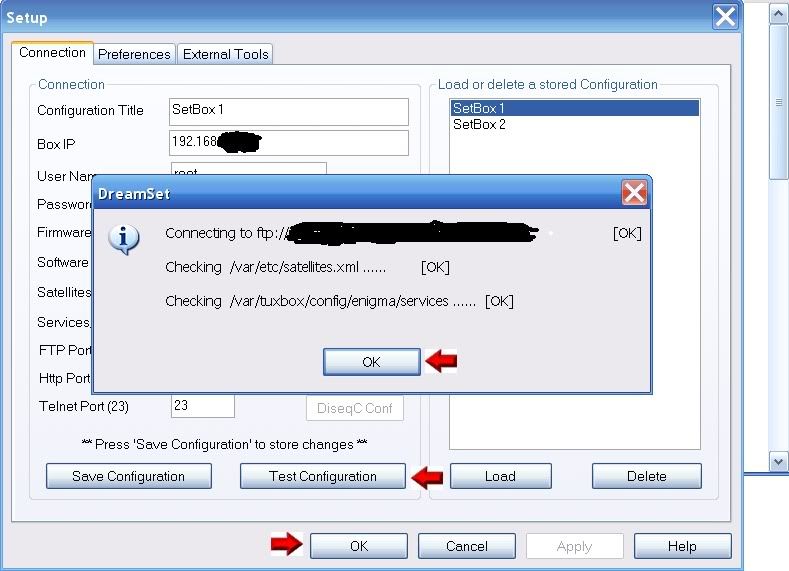
5. Now click the save configuration tab and then the test configuration tab to check we have a connection to the Dreambox. If successful press OK and then OK again
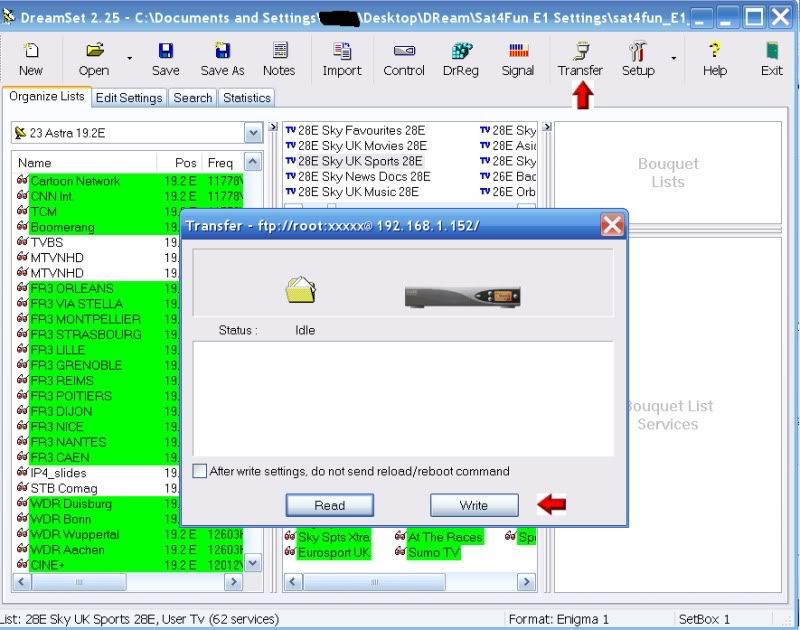
6. Now click open and scroll to the settings and select the services for E1 and lamdb file for E2 and open.
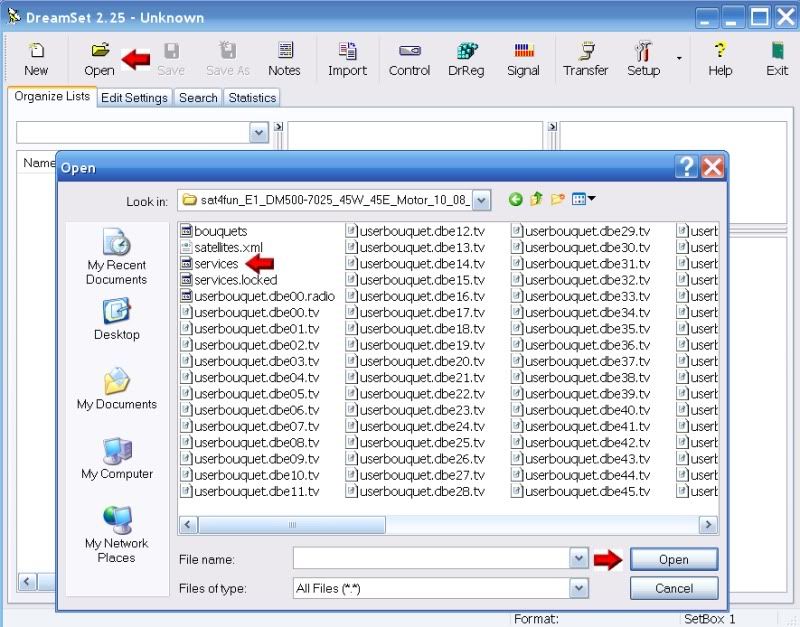
Now click the transfer button and then write and wait for it to finish.
Job done
How to Reset Dreambox root passwordReset Dreambox root password
If you happen to forget your Dreambox root password, here's how to do it:
If you have an image that accepts plugins from internet (e.g. Gemini)
1) Install TuxCom plugin
2) Run it from Yellow button
3) Point to /var/etc/passwd
change the line containing root into root::0:0::/:/bin/sh
now you can telnet your Dreambox with an empty root password and create a new password for root.
Change Your Dreambox Password With DCC ( Pictorial)
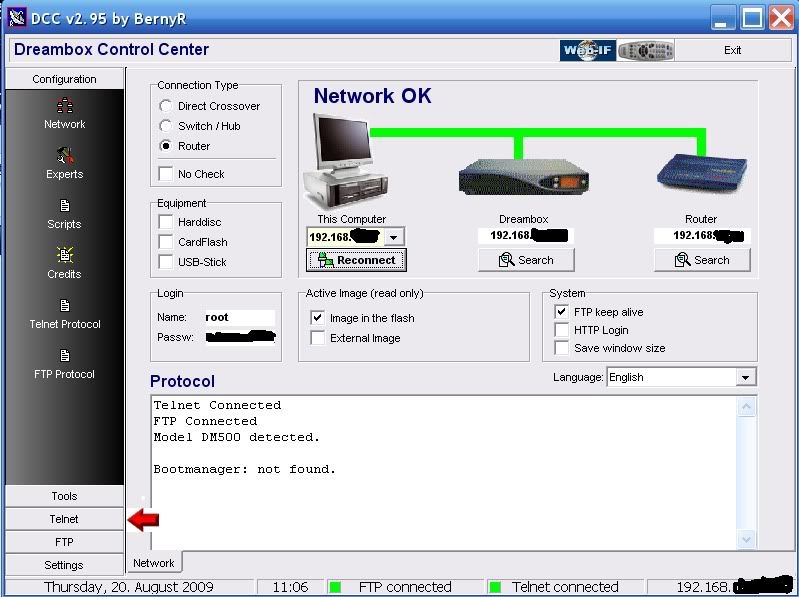
Change Your Dreambox Password With DCC ( Pictorial)1. Start DCC and ensure your network is ok and you have green lines to your router and Dreambox.
2. Click on the Telnet Tab.
3. At the prompt type passwd and click enter.
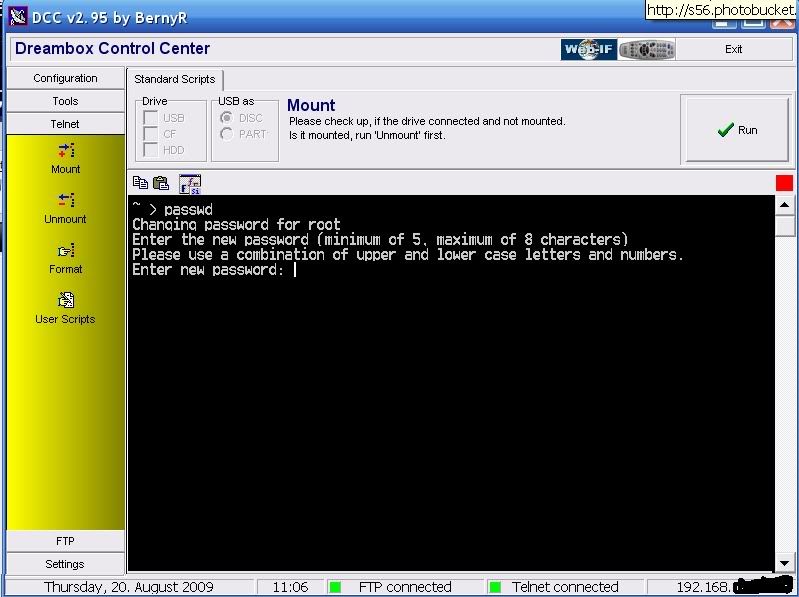
4. Ignore what it states about password length and enter a new password. Any length. Please note the cursor will not move and you will not see what you type, Then press enter.
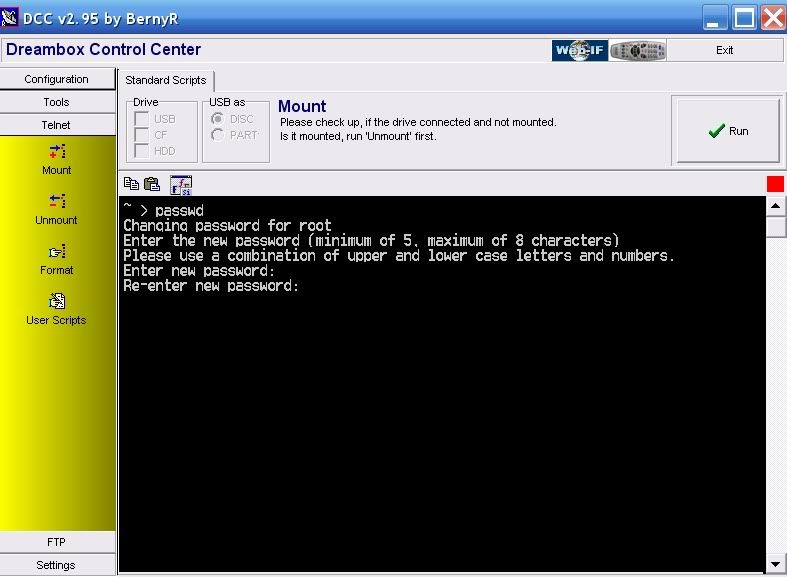
5. Job Done.
How To Setup A None Usuals Motor On A DreamboxHow To Setup Motor Position Diseqc 1.2 None Usuals Motor.
This guide will briefly show you how to configure a none Usuals motor on your Dreambox under the Diseqc 1.2 protocol.
On your Remote.
1. Setup-Service Searching-Motor-Setup.
2. Untick GotoX.
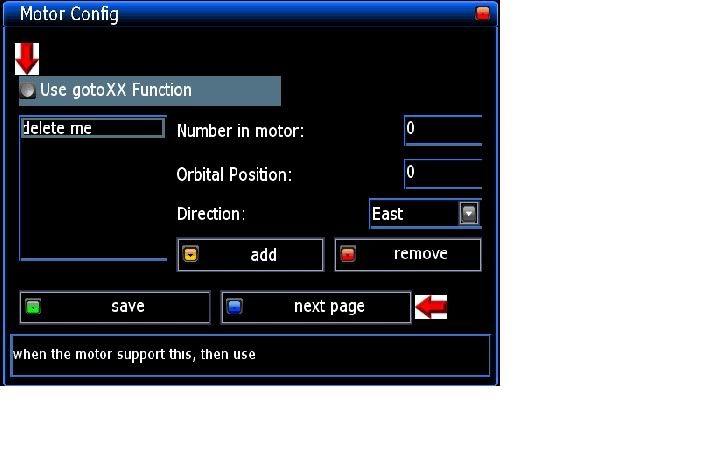
3. Press blue button for next page.
4. Make sure top drop-down bar is in position mode.
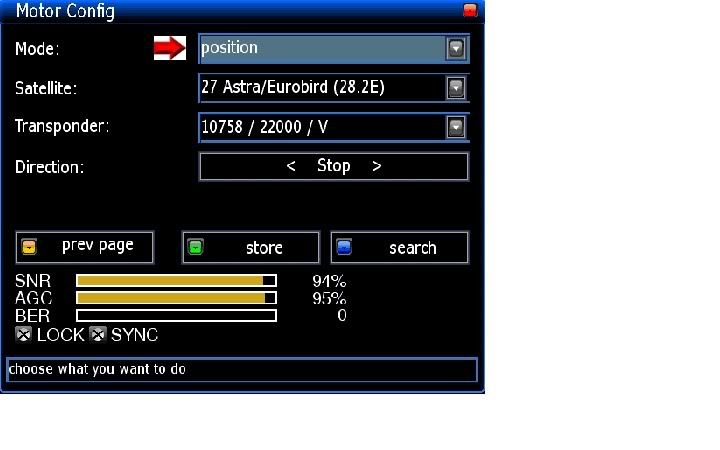
5. Start at Left side of Arc and select say 45 east.
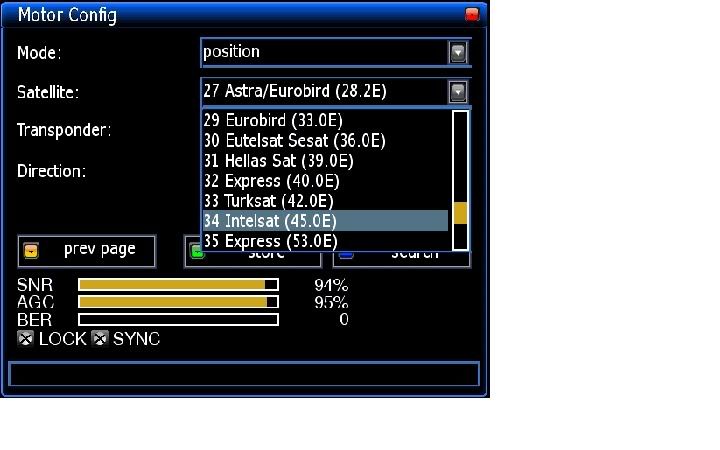
6. Scroll to direction bar.
7. Now use the <> buttons on your remote to find 45 east, if you don't make sure the transponder your on is a working one ( Check Lyngsat) and try again.
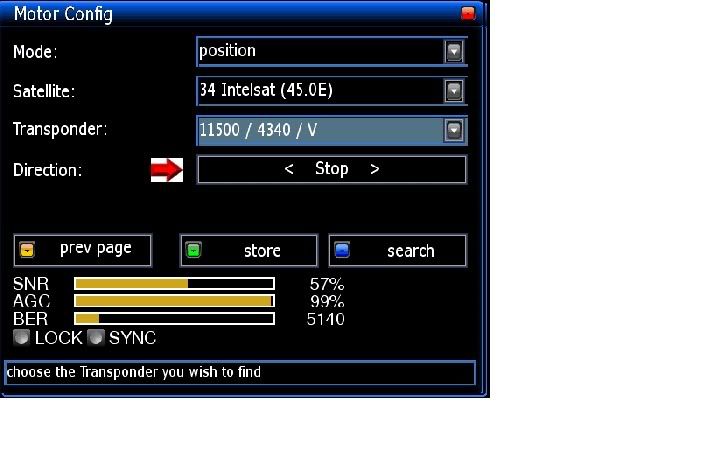
8. When you find the signal and confirm it is the correct orbital position press the green button to store it. On the pop-up store at position 1.
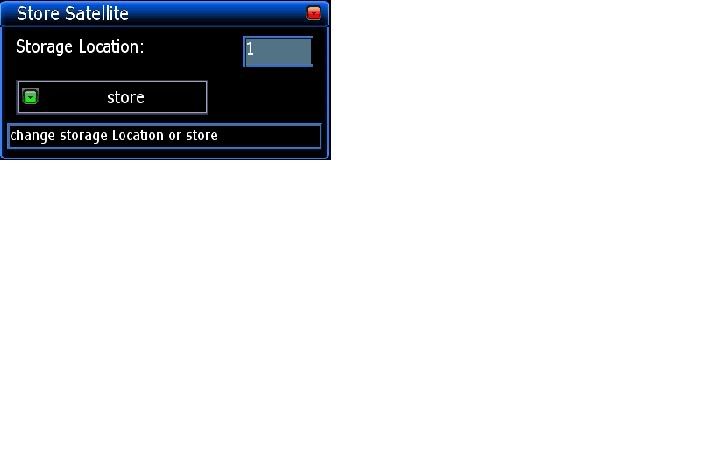
Now repeat all the above for the next orbital position say 42 east and sore at position 2, repeat until all orbital positions are covered.
THX FERRET!!


